Connect Python with SQL Server
I have loads of data. And now what? What do I do with it? How should I act upon it? How do I learn from the data and generate knowledge and intelligence? These might be some of the questions you ask yourself daily as a project planner managing your projects. Primavera P6 is an almost inexhaustible source of data from which you can derive significant benefits. We are going to teach you how to connect Python with SQL Server so you can maximise the potential of both structured and unstructured data within Primavera P6 Professional. Are you ready?
SUBSCRIBE TO OUR YOUTUBE CHANNEL
Initial Step to Connect Python with SQL Server
Before starting this guide on connecting Python with SQL Server, you must have Primavera P6 previously set up in an SQL Server database. If you haven’t done so yet, have a look at our article on how to set up a Microsoft SQL Server database for Primavera P6 Professional first. Similarly, you should have Python installed on your computer. And if everything is ready, let’s begin.
Setting up a New “Login” in Microsoft SQL Server Management Studio
Access Microsoft SQL Server Management Studio
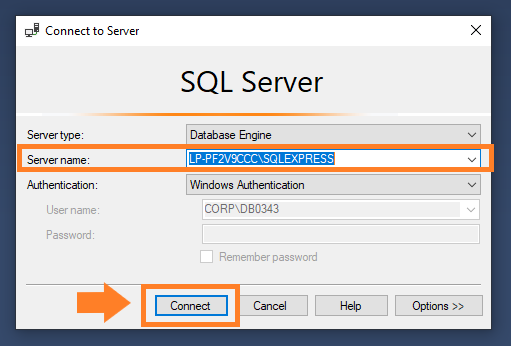
The next step to connect Python with SQL Server is to open the database manager, Microsoft SQL Server Management Studio, from your computer’s “Start” menu. In the window that appears, titled “Connect to Server,” select the name of the server where the Primavera P6 database you are working with is located, and press the “Connect” button.
It’s Time to Create a New “Login” to Connect from Python
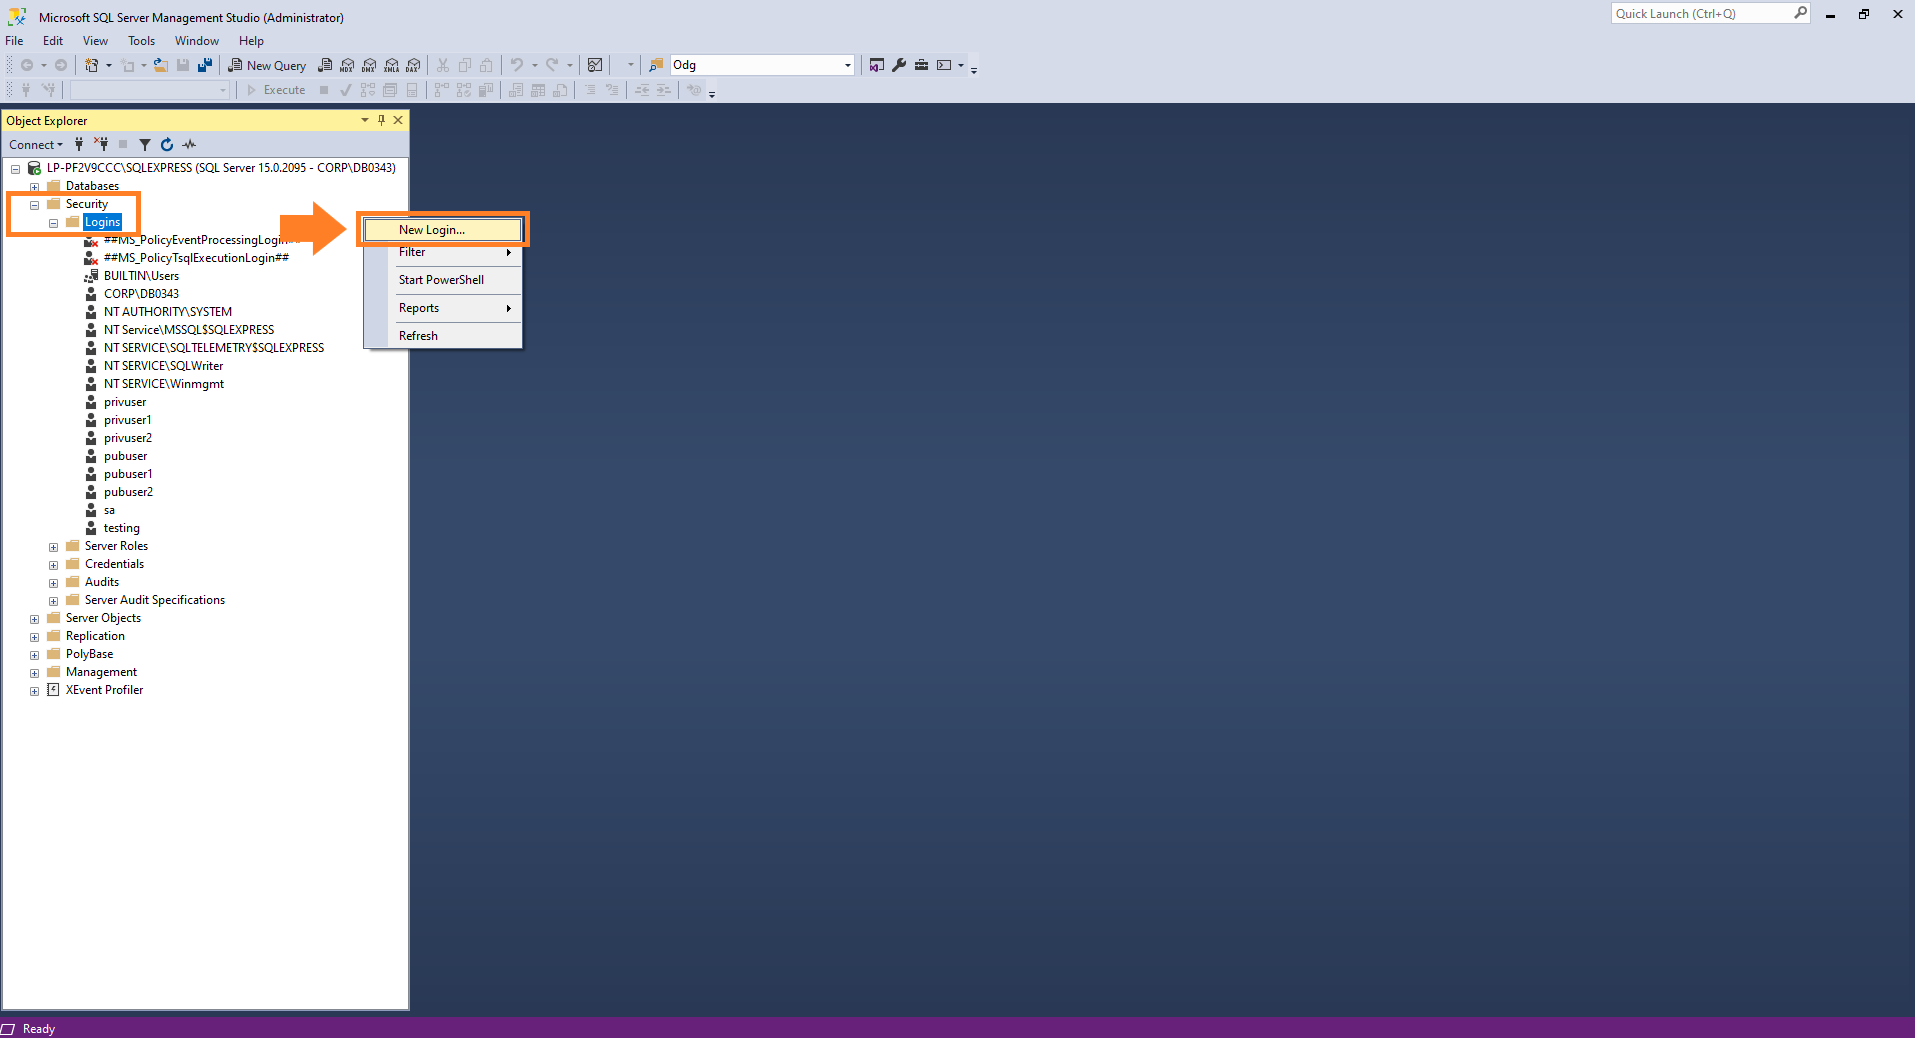
Create a new Login now. To do this, you need to navigate to the “Logins” folder, located within the “Security” folder. Once there, right-click on the “Logins” folder and select the option “New Login”.
Configure Your New “Login”
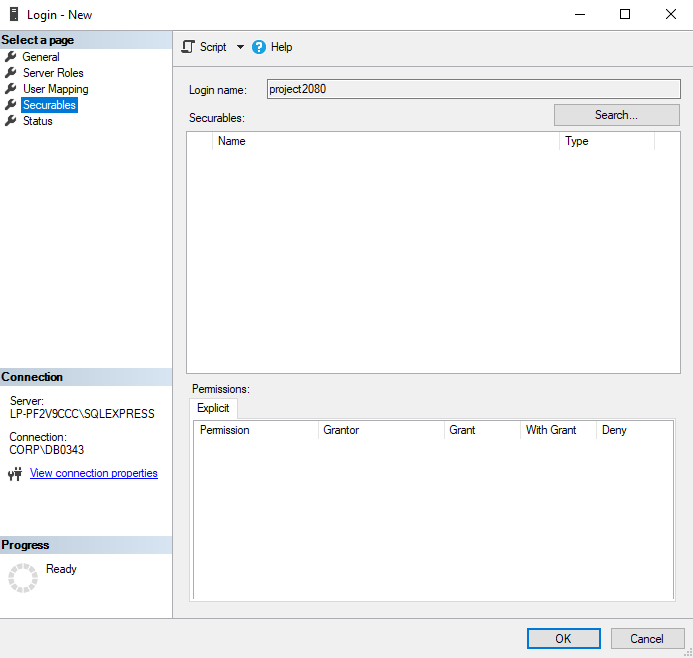
A new window called “Login-New” will appear, where you will see a series of pages to navigate in the top-left corner. First, go to the page called “General”. Here, you must specify a login name. In our case, we selected “project2080”. Select the “SQL Server authentication” option and add a password. We chose “Project*2080” as the password. Remember to note this down because you will need these two pieces of information when connecting from Python. In the field for “Default database”, select the database you use for Primavera P6 Professional. In our case, it’s “PROJECT2080”.

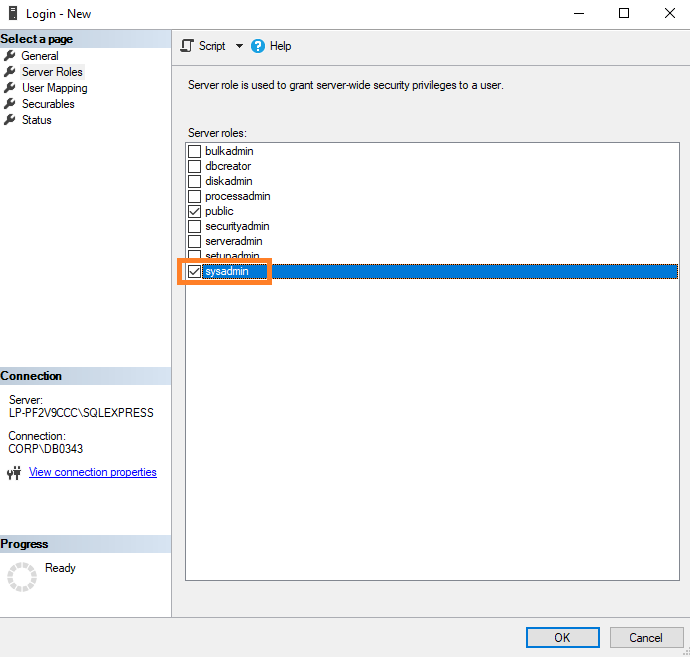
In the “Server Roles” page, make sure to tick the “sysadmin” role. The “public” option is selected by default and can remain checked if your profile is public.
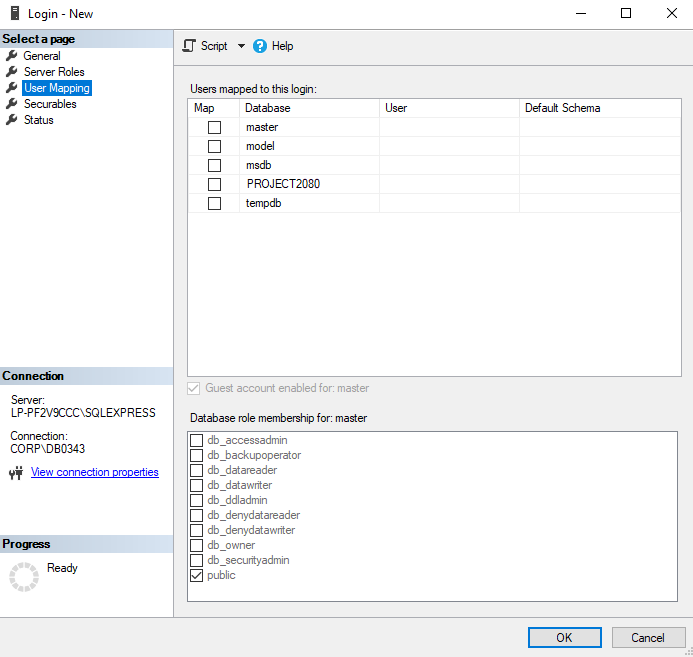
Ensure that in each of the following windows, you make the same selections as shown below.
Finally, on the “Status” page, make sure the options shown in the following screenshot are selected. Press “Ok” to continue.
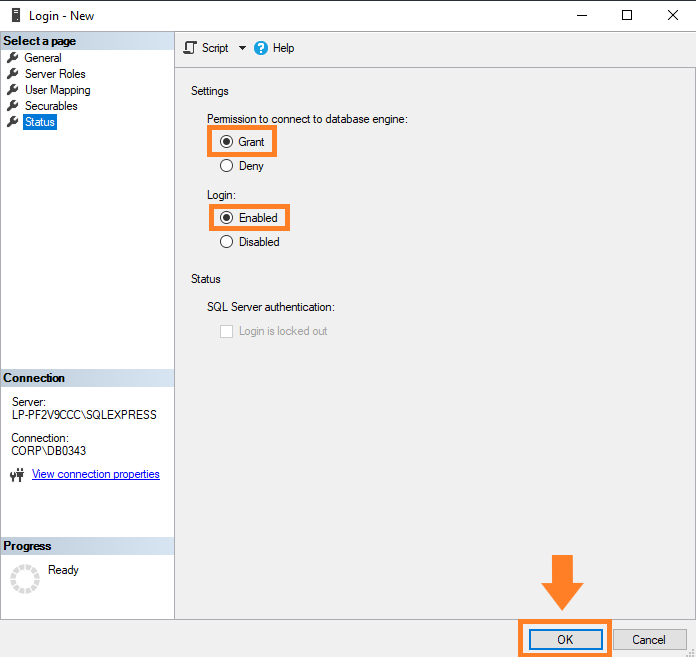
Once the window has closed, close the connection and reopen it. You will have completed the access setup and can now start connecting to SQL Server from Python.
How to Create a Connection with SQL Server from Python
After creating the new “Login”, it’s time to connect Python with SQL Server. Open a new Python notebook and create a connection to SQL Server. This way, you’ll have full access to the tables, fields, and records of the Primavera P6 database.
Setting Up the Environment in Python
In this first step, we will import the libraries needed to establish the connection between Python and SQL Server. For this article, we will only need the “pyodbc” and “pandas” libraries, as shown in the following code snippet.

Create a Connection with SQL Server
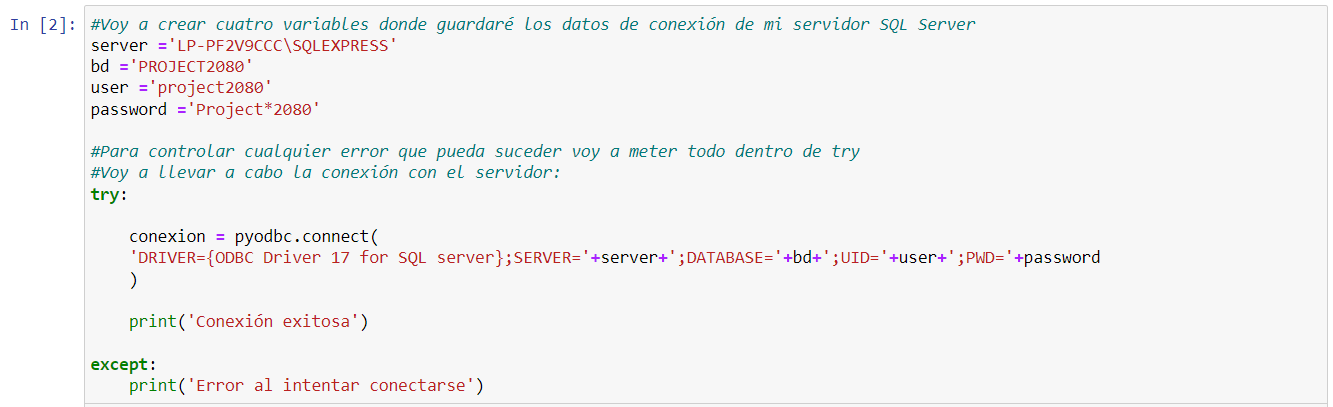
To work with the Primavera P6 database (in our case, it’s called “PROJECT2080”) hosted on `SQL Server`, we’ll create a connection using the `project2080` user we set up earlier. You’ll also need to download and install the ODBC driver for SQL Server to enable the connection using Python’s “pyodbc” library.
Use the following Python code and ensure you set the four variables according to your own configuration on your computer.
Create DataFrames Based on Queries to the Database
Next, we will create two DataFrames:
- The first DataFrame will display the tables in our P6 database.
- The second DataFrame will refer to the fields or columns of the database.
To achieve this, it will be necessary to create a cursor for the connection to store information in memory. Using queries, we will access the tables in our Primavera P6 Professional database. Finally, we will save these queries as DataFrames to inspect them later. Below, you can see the Python code to use.
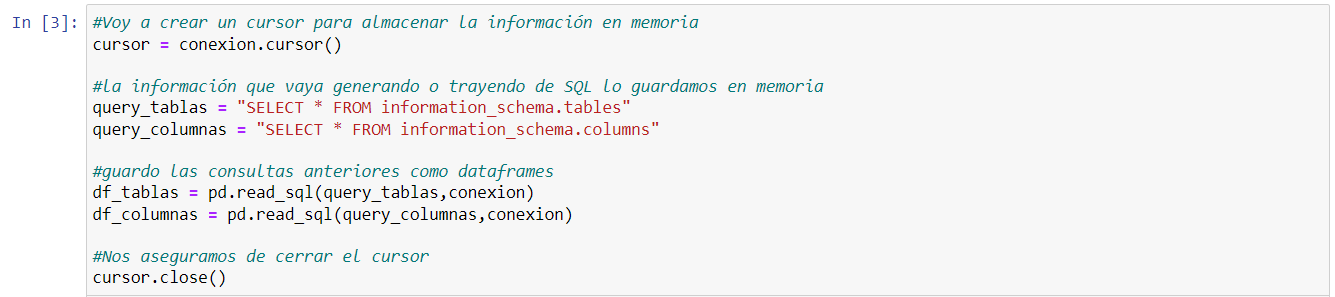
Make sure to close the cursor.
After Connecting Python to SQL Server: Inspect the Data
We now have two DataFrames saved: one that references the tables in our database and another that references the columns. In this final step, we will inspect both DataFrames to see what kind of data we’ve retrieved. For a basic inspection, we’ll use the .info() and .sample() functions.
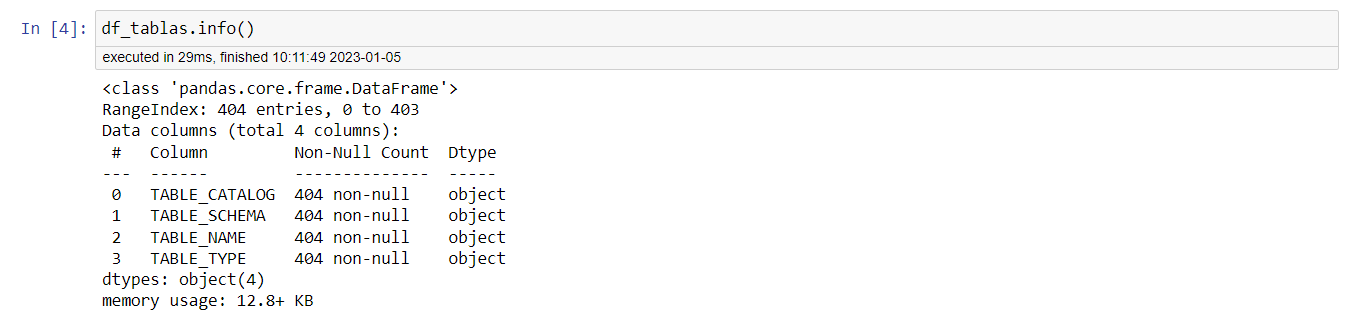
As you can see, we now have a lot of information about the table DataFrame (df_tablas) using the .info() function. There are 404 entries ranging from 0 to 403. The total number of columns is 4, identified by an index number (#), the column name (“Column”), the number of non-null values (“Non-Null Count”), and the data type (“Dtype”). Our tables contain no null values, and the data type is “object”. Lastly, we can see that 12.8 kB of memory has been used.
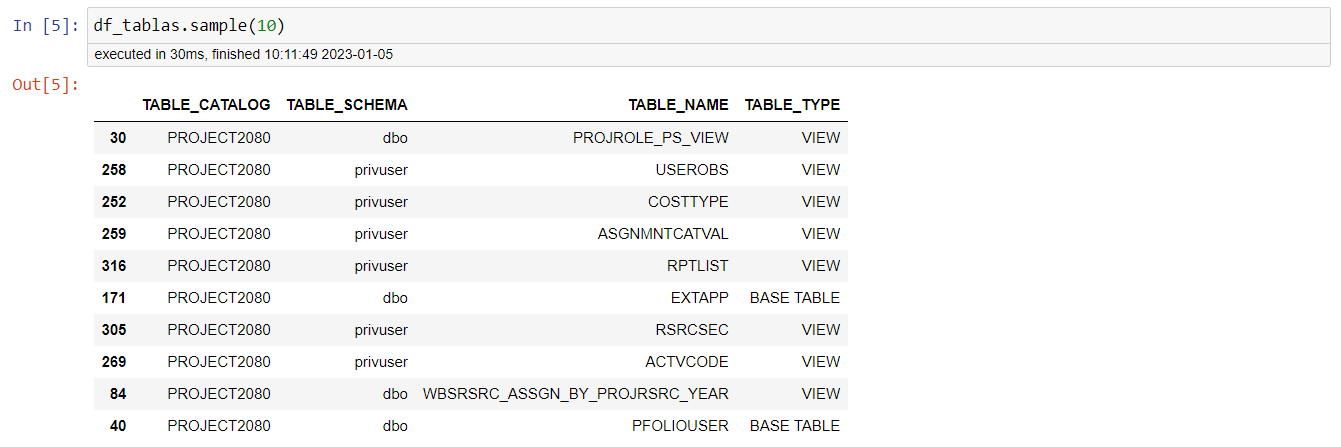
When we use the .sample() function, we see a random sample of 10 rows from our table DataFrame (df_tablas). By specifying the number 10 inside the parentheses, we are instructing Python to return only 10 rows from the DataFrame.
If you’d like to learn how to inspect the DataFrame containing the columns from our Primavera P6 database, you can download the complete notebook on how to connect Python with SQL Server. It also includes some basic filters to identify the “Primary Key” columns for each table in the P6 database.
AT PROJECT 2080, WE’D LIKE YOU TO REMEMBER
We told you we were going to start applying Data Science and Deep Learning to Project Planning and Control, and we’ve delivered. Connecting Python with SQL Server is just the first step. Perhaps you won’t become a Python programming expert or an SQL guru, but you’ll have all the tools you need to perform an exhaustive analysis of your activity schedules, identify patterns, and conduct predictive analysis of your projects. And we’re here to teach you how. So, if you haven’t done so yet:
SUBSCRIBE TO OUR YOUTUBE CHANNEL